
Best Way to Paint Over Soot Damage: Techniques for Different Surfaces
Soot damage is a common problem for homeowners who have experienced a fire or even a minor smoke incident. Soot is a byproduct of incomplete combustion and can cling to surfaces, causing discoloration, stains, and unpleasant odors. The damage can occur on walls, ceilings, furniture, and other characters throughout the home.
Not only is soot unsightly, but it can also pose health risks to the house’s occupants. The particles can enter the lungs and cause respiratory problems, especially for those with pre-existing conditions like asthma. Additionally, soot can absorb moisture and become a breeding ground for mold and mildew, further exacerbating health issues.
Fortunately, there are ways to restore surfaces affected by soot damage. One of the most effective solutions is to paint over the damaged surfaces. Painting covers the soot stains and seals the surfaces, preventing any remaining particles from becoming airborne. In this article, we will discuss the best techniques for painting soot damage on different characters and the importance of doing so for your home’s health and aesthetics.
Preparing for Painting
Before painting over soot damage, it is crucial to clean the surfaces to ensure the best possible outcome properly. Failure to clean the surfaces thoroughly can result in poor paint adhesion, leading to a less durable finish. Here are some tips on how to prepare surfaces for painting after soot damage:
- Wear protective gear: It is essential to wear protective equipment such as gloves, goggles, and a mask to avoid inhaling soot particles and other harmful chemicals.
- Vacuum or dry-wipe the surfaces: Begin by vacuuming or dry-wiping the characters to remove loose soot particles. Be sure to use a vacuum with a HEPA filter or a dry-wipe cloth to avoid spreading the particles.
- Wash with soap and water: Next, wash the surfaces with soap and water to remove any remaining soot residue. Use a soft sponge or cloth to avoid scratching the surfaces. Rinse the surfaces with clean water and let them dry completely.
- Use a specialized cleaner for stubborn stains: For stubborn stains that cannot be removed with soap and water, use a specialized cleaner designed for soot removal. Follow the manufacturer’s instructions and wear protective gear when using these cleaners.
When cleaning soot damage on different surfaces, such as walls, ceilings, and furniture, there are some additional tips to keep in mind:
Walls:
- Start from the top and work your way down to avoid streaking.
- Use a sponge or cloth that is damp but not dripping wet to prevent saturating the walls with water.
- Rinse the walls thoroughly with clean water to remove any soap residue.
Ceilings:
- Use a ladder or scaffolding to access the top safely.
- Use a soft-bristled brush or cloth to clean the top, being careful not to press too hard and damage the surface.
Furniture:
- Use a dry-wipe cloth to remove loose soot particles from the surface.
- Clean the table with a specialized cleaner or soap and water, being careful not to saturate the surface with water.
- Dry the furniture thoroughly before painting to avoid water damage.
Cleaning surfaces thoroughly before painting over soot damage is essential for achieving a smooth, durable finish. By following these tips, you can ensure that your surfaces are properly prepared for painting, helping to restore the aesthetics of your home after soot damage.
Techniques for Painting Over Soot Damage on Different Surfaces
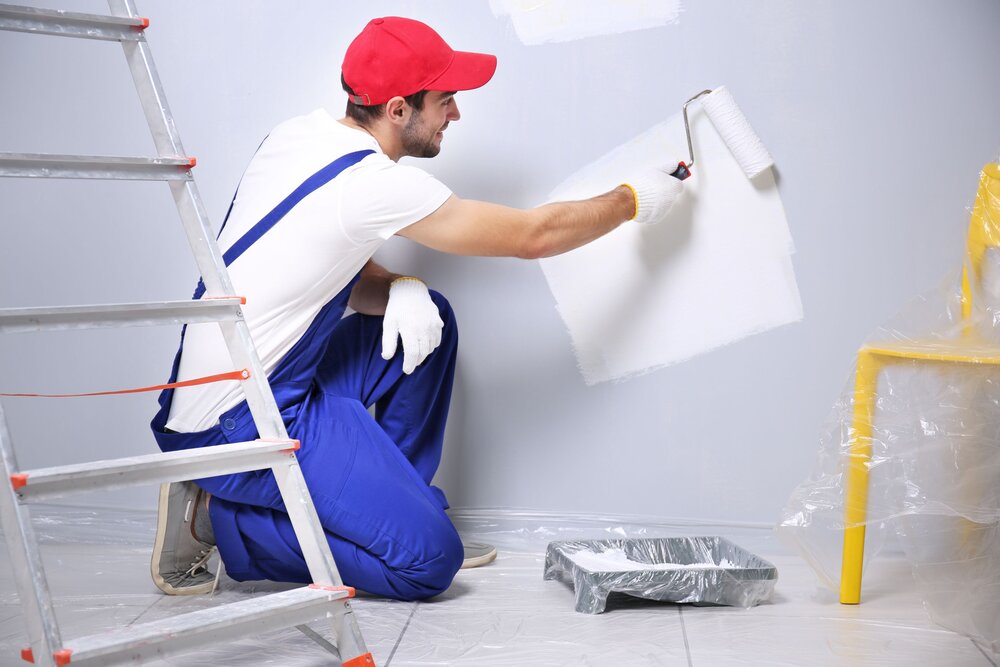
Painting over soot damage on walls can be challenging, but it is essential to restore the aesthetics of your home. Here are some tips for achieving a smooth finish when painting over soot damage on walls:
- Choose the suitable primer: Choosing the right primer is crucial for painting over soot damage on walls. Use a high-quality primer designed explicitly for covering stains and blocking odors. Oil-based primers are typically more effective than water-based ones. Make sure to let the primer dry completely before applying the paint.
- Apply the primer and paint: When applying the primer and paint, use a roller or brush to achieve even coverage. Follow the manufacturer’s instructions and apply the paint in thin coats. Allow each coat to dry completely before applying the next one.
Tips for Achieving a Smooth Finish
- Sand the surface before applying the primer and paint to ensure an even consistency.
- Use high-quality paint with a matte or eggshell finish to minimize the appearance of any remaining soot stains.
- Avoid overloading the brush or roller with lacquer to prevent drips and uneven coverage.
- Color in natural light to ensure that you don’t miss any spots.
- Consider using a paint sprayer to achieve an even, professional-looking finish.
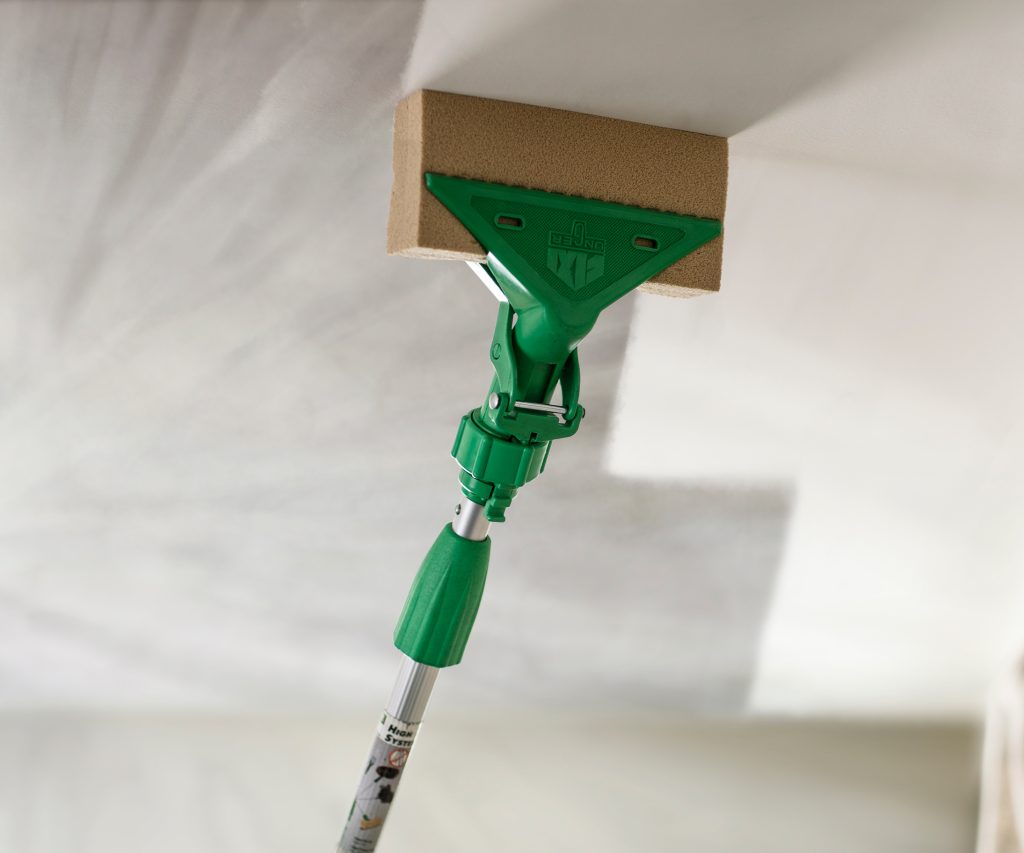
Painting Over Soot Damage on Ceilings
Painting over soot damage on ceilings can be particularly challenging due to the difficulty of accessing the surface. Here are some tips for painting over soot damage on ceilings:
- Use a roller with an extension handle: Using a roller with an extension handle will allow you to reach the ceiling without a ladder or scaffolding.
- Choose the suitable primer and paint: Choose a primer and paint specifically designed for use on ceilings. Use high-quality paint with a matte finish to minimize the appearance of any remaining soot stains.
- Apply the primer and paint in thin coats: Apply the primer and paint in thin, even coats, allowing each coat to dry completely before applying the next one.
- Work in sections: To cover the entire ceiling evenly, work in small sections simultaneously.
Painting Over Soot Damage on Furniture
Painting over soot damage on furniture requires a different approach than painting walls or ceilings. Here are some tips for achieving a smooth finish when painting over soot damage on furniture:
- Clean the surface thoroughly: Before painting, clean the furniture’s surface thoroughly with soap and water or a specialized cleaner. Make sure to let the surface dry completely before painting.
- Sand the surface: Sand the furniture’s surface lightly to create a smooth, even surface for painting.
- Apply the primer and paint in thin coats: Use a high-quality primer and paint specifically designed for use on furniture. Apply the primer and paint in thin, even coats, allowing each coat to dry completely before applying the next one.
- Use a paintbrush for small details: Use a small paintbrush to paint any small pieces or notches on the furniture.
Painting over soot damage on different surfaces requires careful preparation and attention to detail. However, by choosing the suitable primer and paint, applying them in thin coats, and following these tips, you can achieve a smooth, professional-looking finish that restores the aesthetics of your home.
Painting Over Soot Damage on Ceilings
Painting over soot damage on ceilings can be particularly challenging due to the difficulty of accessing the surface. However, it is important to restore the aesthetics of your home and eliminate any potential health hazards caused by the soot damage. Here are some tips for painting over soot damage on ceilings:
- Safety first: Before starting, take the necessary safety precautions when accessing the ceiling. Use a sturdy ladder or scaffolding to access the ceiling, and ensure it is positioned on a stable surface. Wear appropriate safety gear, including a respirator mask and safety goggles.
- Choose the suitable primer and paint: Choose a primer and paint specifically designed for use on ceilings. Look for high-quality paint with a matte finish to minimize the appearance of any remaining soot stains.
- Clean the ceiling: Before painting, clean the ceiling thoroughly to remove any dust or debris that could affect the adhesion of the primer and paint. Use a vacuum or soft-bristled brush to remove loose debris, and wipe the surface with a damp cloth.
- Apply the primer: Apply the primer in thin, even coats using a roller or brush. Follow the manufacturer’s instructions and allow the primer to dry completely before applying the paint.
- Apply the paint: Apply the paint in thin, even coats using a roller with an extension handle. Work in small sections at a time to cover the entire ceiling evenly. Allow each coat to dry completely before applying the next one.
Tips for Achieving a Smooth Finish
- Use a roller with a low nap to achieve a smooth finish.
- Avoid overloading the roller with paint to prevent drips and uneven coverage.
- Color in natural light to ensure that you don’t miss any spots.
- Consider using a paint sprayer to achieve an even, professional-looking finish.
Painting over soot damage on ceilings can be challenging, but with the proper preparation and technique, achieving a smooth, professional-looking finish is possible. By choosing the suitable primer and paint, safely accessing the ceiling, and applying the paint in thin, even coats, you can restore the aesthetics of your home and eliminate any potential health hazards caused by the soot damage.
Best Products and Tools for Painting Over Soot Damage
Choosing the right products and tools for painting over soot damage is essential to achieving a smooth and long-lasting finish. Here are some recommendations based on the different surfaces to be painted:
- Walls: When painting over soot damage on walls, choose a high-quality primer to cover stains and smoke damage. Look for a stain-blocking primer that also seals the surface to prevent any remaining soot from bleeding through the new paint. For the color, choose a high-quality latex or acrylic paint with a semi-gloss or eggshell finish to minimize the appearance of any remaining stains. A paint roller with a medium nap and a brush with tapered bristles will provide the best coverage and a smooth finish.
- Ceilings: When painting over soot damage on roofs, choose a paint designed explicitly for canopies, such as a flat or matte finish paint. Look for a color with a high hiding power to minimize the appearance of any remaining stains. A paint sprayer or roller with an extension pole will provide the best coverage and an even finish.
- Furniture: When painting over soot damage on furniture, choose a high-quality primer designed for wood or metal surfaces. Look for a primer that also seals the surface to prevent any remaining soot from bleeding through the new paint. For the paint, choose a high-quality latex or oil-based paint with a satin or semi-gloss finish to provide a durable and attractive finish. A paintbrush with tapered bristles and a foam roller will give the best coverage and a smooth finish.
In addition to the paint and primer, some other tools will make the painting process easier and more efficient, such as:
- A paintbrush comb or wire brush to clean and maintain the paintbrushes
- A paint can opener to easily open cans of paint
- Painter’s tape to mask off any areas you don’t want to paint
- A drop cloth to protect floors and furniture from paint drips and spills
Choosing the right products and tools for painting over soot damage is essential to achieving a smooth and long-lasting finish. By selecting the appropriate paint, primer, and tools for the specific surface to be painted, you can perform a professional-looking finish that will restore the aesthetics of your home and eliminate any potential health hazards caused by the soot damage.
Painting over soot damage is essential in restoring your home’s aesthetics and health. Soot damage can leave unsightly stains and potentially harmful particles in your home, making it essential to address the issue promptly. Following the techniques outlined in this blog, including correctly preparing surfaces, choosing the right products and tools, and applying the paint and primer correctly, you can achieve a professional-looking finish that will restore your home to its former glory.
